
Custom cabinetry · 35 min read
Custom Cabinetry Explained
Understand storage planning, construction choices, finishes, hardware, and the details that make cabinetry work beautifully.
Excerpt: Custom cabinetry is one of the most consequential decisions in any kitchen, bath, or built-in project—shaping how a room functions for decades and how much of the budget disappears into a single category. This guide walks homeowners through the full decision tree: how to think about storage needs before style, how construction methods and materials affect longevity, how finishes and hardware change both look and maintenance, and how to work with a cabinetmaker or shop from first sketch to final install so the result actually earns its price tag.
What "Custom Cabinetry" Actually Means
The word "custom" gets used loosely in the cabinetry world, and understanding the real distinctions will save confusion and money before a single drawing is made. In the trade, cabinetry generally falls into three tiers: stock, semi-custom, and true custom, and each represents a different relationship between price, flexibility, and lead time.
Stock cabinetry is built in fixed sizes, fixed finishes, and fixed configurations, then shipped from a warehouse or big-box retailer. It is inexpensive and fast, but the homeowner adapts the room to the cabinets rather than the other way around. Semi-custom cabinetry starts from a manufacturer's standard box sizes and door styles but allows modifications—different depths, added moldings, specialty inserts, extended finish options—within a catalog of choices. This is the most common category for mid-range renovations because it balances cost against flexibility.
True custom cabinetry is built to the homeowner's exact specifications by a cabinetmaker or custom shop, with no constraint to a manufacturer's module sizes. Every dimension, every joint, every finish can be specified. This is where a kitchen with an odd angle, a ceiling that slopes, a built-in bench that wraps a bay window, or a home office wall system with a hidden printer nook becomes possible. True custom work costs more per linear foot and takes longer to produce, but it is the only path when the space itself is unusual or when the homeowner has very specific functional requirements that off-the-shelf modules cannot satisfy.
Knowing which tier a project actually needs—rather than assuming "custom" is always correct—is the first money-saving decision. Many homeowners pay custom prices for storage needs that semi-custom cabinetry could have solved. Others try to force semi-custom cabinetry into a space that genuinely requires custom work and end up with awkward filler panels, wasted corners, or appliances that do not fit flush. A candid conversation with a designer or cabinetmaker about which tier fits the project's actual constraints should happen before any style conversations begin.
Starting With Function, Not Style
It is tempting to begin a cabinetry project by browsing door styles and finish samples, but the more durable approach is to start with an honest inventory of what needs to be stored, how it is used, and by whom. Style decisions are reversible in spirit—tastes shift, paint can be refreshed, hardware can be swapped—but the bones of a cabinet layout are not. Once boxes are built and installed, changing the internal configuration is expensive and sometimes impossible without demolition.
A useful exercise is to walk through every category of item that needs a home: everyday dishware, everyday cookware, small appliances used daily versus occasionally, bulk pantry goods, cleaning supplies, recycling and trash, linens, out-of-season items, and anything unique to the household such as a stand mixer, a coffee station, or pet food storage. For each category, note not just what it is but how often it is accessed and by whom. A drawer used multiple times a day at counter height behaves very differently than a cabinet used twice a year that can live in a hard-to-reach upper corner.
This inventory should also account for physical realities of the people using the space. A household with mobility limitations benefits from pull-out shelving at lower heights and avoids deep base cabinets that require kneeling and reaching. A household with young children may want childproof latches on lower cabinets holding cleaning chemicals and easy-reach cabinets for dishes kids can help unload. A avid home cook may prioritize a dedicated baking station with flour and sugar bins built into a pull-out, while a household that rarely cooks may prioritize appliance garage space over extensive pot storage.
Only after this functional map exists does it make sense to translate it into a layout: how many linear feet of base cabinets, how many drawer banks versus doors, where the tall pantry cabinet goes, and where specialty storage—wine racks, appliance garages, charging stations—fits into the plan. Skipping this step and jumping straight to selecting door panels and countertop colors is the single most common reason homeowners end up with beautiful cabinetry that does not actually serve how they live.
Mapping the Kitchen Work Triangle and Traffic Flow
Cabinetry does not exist in isolation from the room's overall workflow, and even a custom cabinet shop building beautiful boxes cannot compensate for a floor plan that fights the way people move through a kitchen. The classic "work triangle" concept—connecting the sink, refrigerator, and cooking surface—remains a useful starting framework even though modern kitchens with multiple cooks, islands, and open floor plans have evolved past a literal triangle into more flexible "zones."
Rather than thinking purely in triangle terms, it helps to define functional zones: a prep zone near the sink with cutting board storage and a trash pull-out close at hand, a cooking zone near the range with pot and pan storage and spice storage within arm's reach, a cleanup zone with dish storage near the dishwasher for easy put-away, and a landing zone near the entry or eating area for keys, mail, and quick-grab items. Custom cabinetry can be designed around these zones specifically, with drawer contents planned to match what happens at each station rather than treating every base cabinet as generic storage.
Traffic flow also determines cabinet door swing and drawer clearance. A cabinetmaker or designer should walk through worst-case scenarios: can the dishwasher door and a nearby cabinet door be open at the same time without collision? Does a full-extension drawer clear a walkway when fully open? Is there enough clearance for two people to work at adjacent stations, such as someone at the sink and someone at the range, without constant collision? These clearances are typically governed by general kitchen design guidelines recommending at least 42 inches of clearance in walkways with one cook and more in kitchens designed for multiple cooks, though exact figures should be confirmed with a designer familiar with current guidelines and any local building code requirements.
Custom cabinetry offers real advantages here because box widths, filler panels, and even the depth of specific runs can be adjusted to resolve traffic conflicts that stock or semi-custom sizing cannot. A base cabinet run that is two inches too deep for comfortable walkway clearance can be built two inches shallower in a custom shop; that flexibility is often the deciding factor for irregularly shaped kitchens.
Choosing a Cabinet Layout Style
Beyond function and traffic, homeowners should decide on the overall cabinetry configuration for the room, since this affects everything downstream from box construction to lighting. Common layout approaches include the single-wall kitchen, the galley, the L-shape, the U-shape, and the island or peninsula configuration, and custom cabinetry can adapt any of these to the specific footprint of the room rather than forcing a generic shape onto an irregular space.
An L-shaped layout places cabinetry along two perpendicular walls and works well for open-concept homes because it leaves the rest of the room open for dining or living space. A U-shaped layout wraps cabinetry around three walls and typically offers the most storage and counter space per square foot, making it a strong choice for serious home cooks, though it requires enough room width to avoid feeling cramped. A galley layout runs two parallel cabinet walls with a walkway between them, which is highly efficient for a single cook but can feel tight with more than one person working at once. Adding an island or peninsula, where the floor plan allows, creates additional storage and prep space and often becomes the social hub of the kitchen, but it needs adequate clearance on all sides to avoid bottlenecks.
Custom cabinetry is particularly valuable when a layout does not fit neatly into these standard categories—homes with angled walls, bay windows, structural columns, or oddly placed doorways often need bespoke solutions such as angled corner cabinets, cabinetry that steps around a column, or a run that tapers to follow a non-square wall. A cabinetmaker experienced in custom work can survey these constraints on site and design boxes that fit the actual geometry of the room rather than approximating it with filler strips, which tend to look and function worse than a true custom fit.
Solving Corner Cabinets and Dead Space
Corners are the most persistently frustrating part of any cabinet layout, and how a project handles them says a lot about the quality of the design. A blind corner cabinet—one where cabinetry from two walls meets and part of the interior becomes hard to reach—can waste a significant portion of the base cabinet's storage if left unaddressed. Custom cabinetry offers several strategies, each with tradeoffs worth understanding rather than defaulting to whatever a showroom recommends.
A lazy Susan with rotating shelves is the most familiar solution and works well for pots, mixing bowls, and other items that do not mind spinning into view, though the round shelves waste some square footage relative to the corner's actual volume and items can shift during rotation. A "magic corner" or pull-out corner system uses articulating shelves that swing out of the cabinet and then extend, bringing nearly the full depth of the corner into reach; these mechanisms cost more and require precise installation but recover significantly more usable storage than a lazy Susan. A diagonal corner cabinet with angled doors is another classic option, offering a single accessible shelf space at the cost of some depth efficiency, and it is often chosen for its clean look from the room rather than pure storage capacity.
Some homeowners and designers choose to simply accept a certain amount of dead corner space in exchange for a cleaner cabinet run without visible seams or mechanisms, particularly in kitchens with ample storage elsewhere. This is a legitimate choice, not a compromise to be embarrassed about, provided it is made consciously rather than as an oversight. The wrong approach is failing to discuss corners at all during design and discovering during installation that a blind corner has become unusable dead space by default.
Drawer Systems, Roll-Outs, and Interior Organization
One of the most functionally significant shifts in cabinetry over the past two decades has been the move toward drawer-based base cabinet storage rather than doors with fixed interior shelves. Drawers, particularly deep drawers on full-extension soft-close slides, put contents in full view and full reach without kneeling or reaching into a dark cabinet interior, and for many households this single change improves daily kitchen use more than any finish or style decision.
When planning custom cabinetry, it is worth specifying drawer depth deliberately rather than accepting a shop's default stack. A common and versatile base cabinet configuration uses three stacked drawers of increasing depth—a shallow top drawer for utensils, a medium drawer for smaller cookware or food storage containers, and a deep bottom drawer for pots, pans, or small appliances. For cabinets housing a single large category, such as pot storage or bulk pantry goods, a single deep drawer alone may be more efficient than a stack.
Roll-out shelves are a related but distinct option for cabinets that keep swinging doors rather than converting to full drawers—useful in tall pantry cabinets, under-sink cabinets, or corner solutions where full drawer conversion is not practical. A roll-out on full-extension slides brings the back of a deep cabinet fully into reach, which matters enormously for anyone who has crawled into the back of a fixed-shelf base cabinet looking for a lost lid.
Interior organization accessories are where custom cabinetry can add genuine daily value: dedicated tray dividers for baking sheets and cutting boards, a built-in knife block insert, a spice pull-out with angled shelves, a utensil divider sized to actual utensils rather than a generic grid, a trash and recycling pull-out sized to the household's bin preferences, and a charging drawer with a built-in outlet for small electronics. Each of these should be specified based on the functional inventory completed earlier in the process, not chosen because a showroom display looked appealing. An organizational insert that does not match what a household actually owns becomes wasted cabinetry.
Understanding Cabinet Box Construction: Face-Frame vs. Frameless
The structural approach to building the cabinet box—the basic container before doors, drawers, and finishes are applied—has a meaningful effect on both appearance and interior storage capacity, and it is one of the first construction decisions a cabinetmaker will ask about.
Face-frame construction adds a solid wood frame to the front of the cabinet box, and the doors and drawers are mounted to or within this frame. This is the traditional American cabinetry style, associated with a more classic look and a visible reveal of wood framing around each door and drawer. Face-frame cabinets are generally considered more structurally rigid without additional bracing because the frame itself adds strength, but the frame reduces the usable opening size somewhat, meaning drawer boxes and pull-out shelves are slightly narrower than the outer cabinet dimension would suggest.
Frameless construction, often called European-style construction, eliminates the face frame and mounts doors and drawers directly to the edges of the box sides. This maximizes the usable interior opening, allowing wider drawers and roll-outs and generally more storage volume per cabinet, and it produces a cleaner, more contemporary look with minimal visible framing. Frameless cabinets rely on thicker box material and additional internal bracing for rigidity since they lack the structural frame, so material quality and construction detailing matter more in this style.
Neither approach is objectively superior; the choice is largely aesthetic, tied to the design style of the home, though households prioritizing maximum drawer and shelf capacity often lean frameless, while those wanting a traditional, furniture-like look often lean face-frame. A cabinetmaker can execute either well; the more important variable is the quality of materials and joinery within whichever style is chosen, which is discussed in the next section.
Materials for Cabinet Boxes: Plywood, MDF, and Particleboard
The material used for the cabinet box itself—the sides, back, bottom, and shelves, as distinct from the visible door fronts—has a major effect on long-term durability, weight capacity, and moisture resistance, and it is worth understanding the tradeoffs rather than assuming all "wood cabinets" are built the same way underneath.
Plywood is generally regarded as the strongest and most moisture-resistant option for cabinet boxes. Made of layered wood veneers glued with the grain running in alternating directions, plywood resists warping, holds screws and hardware well over repeated use, and tolerates humidity swings—an important quality near a sink, dishwasher, or in a bathroom vanity—better than composite alternatives. Cabinet-grade plywood, typically half-inch to three-quarter-inch thickness for box sides, is a hallmark of higher-end custom cabinetry.
Medium-density fiberboard, or MDF, is made from wood fibers bonded with resin under heat and pressure into a dense, uniform panel. MDF has no grain, which makes it excellent for painted finishes because it does not telegraph wood grain texture through paint the way some woods can, and it machines very smoothly for detailed profiles. However, MDF is heavier than plywood, has essentially no strength once it gets wet since the fibers swell and do not fully recover, and holds screws less securely than plywood, particularly in edges that see repeated stress such as hinge mounting points reinforced elsewhere in the box.
Particleboard is the least expensive option, made from wood chips and resin compressed into panels, and it is common in lower-cost stock and semi-custom cabinetry, particularly as a substrate under laminate or thermofoil finishes. Particleboard is more prone to sagging under sustained weight, swells significantly when exposed to moisture, and holds hardware less securely than either plywood or MDF. It is not inherently unusable—many functional cabinets use particleboard successfully for decades in dry conditions with light loads—but it is the material most likely to fail prematurely under humidity, heavy loads, or repeated hardware stress, and it is worth avoiding in wet areas like under the sink or in a laundry room.
A well-specified custom cabinetry order will typically use plywood for box construction generally, sometimes with MDF door fronts for a smooth painted finish, and will avoid particleboard except perhaps in low-stress, low-moisture locations if cost considerations require it. Homeowners should ask their cabinetmaker directly what material is used for the box sides, bottom, and back, since finish samples in a showroom rarely reveal what is underneath.
Door and Drawer Front Materials and Styles
While box construction determines durability and interior capacity, door and drawer fronts determine the visible character of the cabinetry and carry their own set of material tradeoffs. Solid wood doors, typically made from a frame-and-panel construction with a floating center panel that can expand and contract with humidity without cracking, offer a traditional, substantial look and can be refinished multiple times over their life since there is real wood thickness to sand. Solid wood is also the most expensive option and, if built without a floating panel to accommodate seasonal movement, can crack or warp in fluctuating humidity.
Plywood doors, sometimes called veneer or flat-panel doors, use a plywood substrate with a thin wood veneer applied to the visible faces. These resist warping better than solid wood because the layered plywood core is dimensionally more stable, and they achieve a clean, flat contemporary look often seen in frameless cabinetry, but they generally cannot be refinished as many times since the veneer layer is thin.
MDF doors, often used for painted cabinetry, provide an extremely smooth, seamless painted surface without visible wood grain and can be machined into detailed profiles such as shaker or raised-panel designs at a lower cost than solid wood. They are heavier than solid wood or plywood equivalents and, as noted above, are vulnerable to swelling if the painted seal is compromised and moisture penetrates the edge.
Thermofoil doors wrap an MDF substrate in a vinyl film under heat and pressure, producing a durable, low-maintenance, seamless surface that resists chipping in normal use and cleans easily. Thermofoil is a lower-cost option well suited to busy households, but it is vulnerable to heat damage—warping or peeling can occur near ranges, warming drawers, or in direct sun exposure—and once damaged it typically cannot be repaired, only replaced.
Laminate doors use a high-pressure or low-pressure plastic laminate adhered to a substrate, offering a huge range of colors and patterns, strong resistance to scratches and stains, and an affordable price point, though the visible edge banding where laminate meets the door edge can be a point of failure over time if not well sealed. In true custom cabinetry, wood species selection also becomes a meaningful design decision—oak, maple, cherry, walnut, and alder each bring distinct grain patterns, hardness levels, and how they accept stain, and a cabinetmaker can guide the choice based on the desired final color and the durability needed for the household's use.
Popular Door Styles and What They Signal Stylistically
The profile of a cabinet door—its shape, panel detail, and edge treatment—does more to define a kitchen's overall style than almost any other single decision, and it is worth understanding the vocabulary before selecting samples. Shaker-style doors, characterized by a flat center panel within a simple, square-edged frame, have remained popular for years because their clean lines work equally well in traditional, transitional, and modern settings; this versatility, combined with straightforward manufacturing, also makes shaker doors one of the more cost-effective custom options.
Flat-panel or slab doors have no frame or raised detail at all—just a single flat surface—and are strongly associated with modern and minimalist kitchens, often paired with frameless box construction and integrated or minimal hardware for a streamlined look. Raised-panel doors feature a center panel that is milled to sit proud of the surrounding frame, often with decorative edge profiles, and this style reads as more traditional or formal; it remains a strong choice for homeowners drawn to classic, furniture-like kitchens.
Beadboard or cottage-style doors incorporate vertical grooves within the panel for a casual, farmhouse-inspired look, often paired with lighter paint colors and visible hardware. Glass-front doors, whether full glass, mullioned, or with a small glass insert, introduce visual variety into a run of cabinetry and are often used selectively—on upper cabinets near a range hood, in a china cabinet, or on a single accent cabinet—rather than throughout an entire kitchen, both because glass fronts require more careful interior organization to look good and because they cost more per unit.
Choosing a door style should be informed by the home's overall architecture and the homeowner's tolerance for how visually busy or plain the kitchen will feel day to day, not solely by current design trends, since cabinetry is a long-term investment that will outlast most short-lived style cycles. A useful test is to imagine the door style without any styling props, dramatic lighting, or accessory decor—does the basic geometry of the door still feel right for the home's architecture and the homeowner's taste on an ordinary Tuesday morning.
Cabinet Finishes: Paint, Stain, and Clear Coats
Once material and door style are chosen, the finish applied to the surface has its own set of durability and maintenance implications that deserve real attention rather than being treated as a pure color decision. Painted finishes, typically a catalyzed or conversion varnish applied over a properly primed and sanded substrate in a professional spray booth, offer the widest color range and a smooth, uniform appearance, and they pair especially well with MDF doors for a seamless look. Professionally sprayed painted finishes are considerably more durable than a brush-applied paint job, since spraying produces an even film thickness without brush marks and the conversion varnish cures into a hard, chemical-resistant surface. Homeowners considering painted cabinetry should ask specifically what type of paint and topcoat system the shop uses and how it is applied, since this affects both appearance and how well the finish resists chipping around handles and door edges over years of use.
Stained finishes highlight the natural grain of wood species rather than covering it, and the range of stain colors combined with wood species creates a large palette from very light, natural tones to deep, near-black finishes. Stain absorbs somewhat differently depending on the wood species and even within a single species depending on grain density, which is why sample doors in the exact wood and stain combination being ordered are essential before committing—looking at a stain chip alone can be misleading.
Clear or natural finishes, which protect the wood with a clear topcoat without altering its color significantly, showcase the wood species' inherent character and tend to darken slightly and develop patina with age and light exposure, particularly with woods like cherry. This aging is a known characteristic rather than a flaw, but homeowners should be aware of it going in so the cabinetry's appearance ten years from now does not come as a surprise.
Beyond the color and topcoat, homeowners should ask about the number of coats applied, whether the finish is sanded between coats, and what the manufacturer or shop's care instructions are, since even a well-applied finish can be damaged by inappropriate cleaning products, excessive standing water at the sink cabinet's toe kick, or direct, prolonged heat exposure near a range.
Hardware: Hinges, Slides, Knobs, and Pulls
Hardware is a small line item in a typical cabinetry budget but has an outsized effect on daily satisfaction, since it is touched literally every time a cabinet or drawer is used. Hinges have evolved considerably; soft-close and self-closing hinge mechanisms, now standard in most mid-range and higher cabinetry, prevent doors from slamming, reduce wear on the box and door over time, and are safer around children's fingers. Concealed European-style hinges, mounted inside the cabinet rather than visible on the door face, are the norm for most contemporary and semi-custom cabinetry, while exposed decorative hinges remain popular for traditional or farmhouse-style kitchens where the hardware is meant to be seen as part of the design.
Drawer slides deserve particular attention because they are one of the most common points of premature failure in lower-quality cabinetry. Full-extension slides, which allow a drawer to pull completely out of the cabinet exposing its entire depth, are worth the modest additional cost over standard three-quarter extension slides, especially for deep drawers holding pots, pans, or bulk goods. Soft-close drawer slides use a damping mechanism to prevent slamming, similarly to soft-close hinges, and this is now a widely expected feature in quality custom cabinetry. Slide weight ratings matter for heavily loaded drawers—a drawer intended to hold a stand mixer, cast iron cookware, or bulk pantry goods should use a slide rated for that load rather than a standard-duty slide that may sag or bind prematurely.
Knobs and pulls are the most visible hardware element and the easiest to change later without touching the cabinetry itself, which means homeowners have some freedom to select hardware based purely on aesthetic preference and comfort in hand, knowing it can be swapped down the road if tastes shift, provided the existing holes are considered if a swap is anticipated. That said, hardware placement height and orientation should still be planned deliberately during the initial design—pulls mounted vertically on tall pantry doors versus horizontally on drawer fronts, consistent placement heights across a run of cabinetry, and consideration of how pulls interact with adjacent appliance handles or an island's seating overhang all affect the finished look more than the specific hardware finish chosen.
Countertop Coordination and Cabinet Height Considerations
Cabinetry and countertops are typically specified together because the base cabinet height, and any adjustments for a chosen countertop's thickness, need to be coordinated before installation rather than reconciled afterward. Standard base cabinet height is commonly around 34.5 inches before the countertop is added, bringing the finished counter height to approximately 36 inches with a standard countertop thickness, though these figures can and should be adjusted for a household's actual height and comfort—a taller household may prefer counters raised an inch or two, and this is a conversation worth having directly with a cabinetmaker or designer rather than assuming a one-size figure applies universally.
Countertop material choice also has implications for the cabinetry itself. Heavier countertop materials such as natural stone slabs require adequately reinforced cabinet boxes and sometimes additional support bracing, particularly for cantilevered sections like an island overhang used for seating. A cabinetmaker building custom boxes should be told the intended countertop material and any overhang plans early in the design process so the box construction can be specified to support the load safely.
Backsplash height, whether a full-height tile backsplash to the underside of the upper cabinets or a shorter four-inch standard backsplash with painted wall above, also interacts with cabinet placement and should be decided in tandem with the cabinet layout rather than treated as an afterthought once cabinets are installed. Similarly, toe kick height and depth—the recessed area at the base of floor cabinets that allows feet to tuck under while standing at the counter—is a small detail that is easy to overlook but meaningfully affects standing comfort, and it can be adjusted in custom work to suit unusually tall or short household members.
Lighting Integration With Cabinetry
Cabinetry and lighting are increasingly planned together because modern cabinet design routinely incorporates electrical elements that must be specified before boxes are built, not retrofitted afterward. Under-cabinet lighting, typically low-profile LED strip or puck lighting mounted to the underside of upper cabinets, illuminates the countertop work surface directly and reduces shadows cast by the homeowner's own body or head when working under overhead room lighting alone. This lighting requires a power source and sometimes a hardwired connection, both of which should be planned with an electrician alongside the cabinet design so that wiring runs can be concealed within or behind the cabinetry rather than surface-mounted as an afterthought.
Interior cabinet lighting, such as small LED lights inside glass-front cabinets or inside deep drawers, adds a refined touch and practical visibility but again requires planning for wiring access, sometimes through a small drilled channel in the box back or a plug strip mounted discreetly inside an adjacent cabinet. Toe-kick lighting, a strip of low, ambient LED lighting recessed into the toe kick area, provides nighttime wayfinding illumination without needing to turn on brighter overhead lights and has become a popular addition in kitchens used at night by households with young children or anyone who prefers not to be blasted with bright light for a midnight glass of water.
When planning custom cabinetry, homeowners should discuss lighting intentions with both the cabinetmaker and an electrician at the design stage, specifying where outlets, switches, and wiring channels need to be built into or routed around the cabinet boxes, since retrofitting lighting into finished, installed cabinetry is more difficult, more visible, and more expensive than planning for it from the start.
Cabinetry for Kitchen Islands and Peninsulas
An island or peninsula, where the floor plan supports one, is often the most heavily used and most visually prominent cabinetry in the room, and it deserves its own dedicated planning conversation distinct from the perimeter cabinetry. Because an island is viewed from multiple sides, its back or end panels—the sides facing the room rather than the work area—need a finished appearance equal to the front-facing cabinetry, which is a detail sometimes missed when a homeowner focuses primarily on the doors they will personally open and close.
If the island incorporates seating, the overhang needed for comfortable knee clearance—commonly in a range of roughly twelve to fifteen inches depending on stool height and countertop thickness—needs to be planned in coordination with the countertop material, since an unsupported overhang beyond a certain point requires corbels, brackets, or additional structural support to prevent the countertop from cracking or flexing under weight, particularly with stone countertops.
Islands are also a natural location for specialized storage and functional additions: a second sink, an integrated dishwasher, a wine refrigerator, deep drawer storage for pots and pans positioned near the range, or a dedicated baking station with a lower counter height for kneading dough. Because the island is often the visual centerpiece of the kitchen, many homeowners choose to differentiate it from the perimeter cabinetry with a contrasting paint color, a different door style, or a furniture-style leg detail, and custom cabinetry accommodates this kind of intentional visual contrast far more gracefully than stock cabinetry, which often limits mixing finishes within a single order.
Custom Cabinetry Beyond the Kitchen
While kitchens receive the most attention in cabinetry planning, the same principles of function-first design, material selection, and construction quality apply equally to cabinetry throughout the rest of the home, and custom work is often the only realistic path for these secondary spaces because they rarely conform to standard dimensions.
Bathroom vanities benefit enormously from custom sizing since bathroom footprints are frequently irregular and plumbing locations are fixed, making a precisely fitted vanity far more space-efficient than a stock unit with a gap on one side. Vanities should be planned around actual storage needs—hair styling tools, towels, cleaning supplies, medications—with consideration for moisture resistance in box materials given the humid environment, making plywood boxes with a well-sealed finish particularly important here.
Laundry room cabinetry benefits from custom planning around the specific washer and dryer dimensions, whether front-load machines with a pedestal or stacked units, and should account for counter space above the machines for folding, along with dedicated storage for detergent, drying racks, and an ironing station if desired. Home office and library built-ins are almost always custom work, since they typically need to accommodate specific equipment, book collection sizes, and sometimes integrated desk surfaces that need to align precisely with adjacent cabinetry heights.
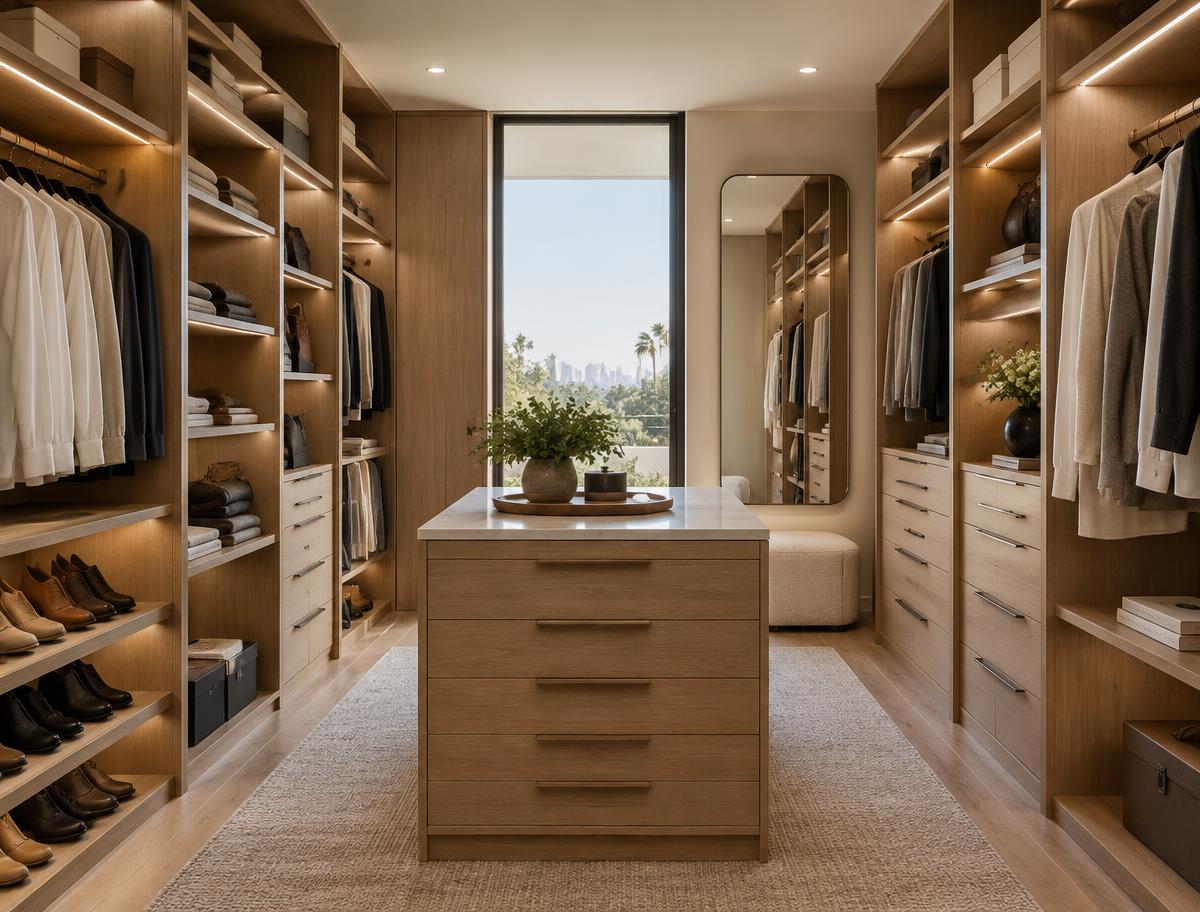
Mudroom and entryway cabinetry, including cubbies, bench seating with storage underneath, and coat and bag hooks integrated into a cabinet face, similarly depends on custom sizing to fit the specific entry configuration and household size. Closet systems, while sometimes treated as a separate trade from cabinetry, follow the same functional-inventory-first planning principle and are increasingly built using the same materials and finish language as the rest of the home's cabinetry for visual consistency in open closet designs. In each of these spaces, the temptation to treat secondary rooms as an afterthought with minimal planning often produces the most persistent daily frustrations, since these are frequently the most trafficked, most cluttered spaces in a home.
Budgeting for Custom Cabinetry Without Fabricated Numbers
Cabinetry costs vary enormously based on region, material choices, door style, finish complexity, hardware quality, and the specific shop or manufacturer building the work, which means any specific dollar figure offered without direct knowledge of a homeowner's market and specifications would be unreliable and potentially misleading. Rather than anchoring to a number, homeowners are better served by understanding the cost drivers so they can have an informed conversation with cabinetmakers and get accurate, current quotes for their specific project and region.
The largest cost drivers, roughly in order of typical impact, are: the box construction material and quality, with plywood boxes costing more than particleboard equivalents; the door material and style, with solid wood and heavily detailed profiles costing more than flat MDF panels; the finish type and application quality, with a multi-coat sprayed conversion varnish costing more than a basic single-coat finish; the linear footage and complexity of the layout, since custom corner solutions, tall pantry units, and specialty inserts each add cost; hardware quality, particularly upgraded slides and hinges; and the specific shop's labor rates and lead times, which vary by region and by how much of the work is done by hand versus with automated machinery.
Homeowners should request itemized quotes that break down these categories separately rather than accepting a single lump sum, since an itemized quote makes it possible to identify where cost-saving adjustments could be made without guessing. For example, a household might choose to keep plywood box construction as a non-negotiable durability priority while choosing a simpler, less labor-intensive door profile to manage overall cost, or might choose to specify upgraded drawer slides only in the highest-use drawers rather than throughout the kitchen.
It is also worth asking directly what is included in a quote versus billed separately—installation labor, delivery, disposal of old cabinetry, any required electrical or plumbing work to accommodate the new layout, and hardware are sometimes itemized separately and sometimes bundled, and clarity here prevents unwelcome surprises during the project.
Working With a Cabinetmaker: Design, Shop Drawings, and Site Verification
The process of moving from an idea to installed custom cabinetry typically follows a fairly consistent sequence, and understanding this sequence helps homeowners know what to expect and what decisions need to be locked in at each stage. The process generally begins with an initial consultation where the homeowner shares the functional inventory, style preferences, and budget parameters, followed by a site visit where the cabinetmaker or designer takes precise measurements of the actual space, including checking walls, floors, and ceilings for level and square, since older homes in particular are rarely perfectly true.
From these measurements, a design phase produces layout drawings, often accompanied by elevation views showing the cabinetry from the front and sometimes 3D renderings, allowing the homeowner to visualize the finished result before any material is cut. This is the stage at which door style, wood species, finish, and hardware are typically finalized, ideally supported by physical samples rather than digital renderings alone, since screen colors do not always accurately represent paint or stain colors in person.
Once the design is approved, the cabinetmaker produces detailed shop drawings—precise technical drawings with exact dimensions for every box, door, and drawer that the shop will build from. Homeowners should review shop drawings carefully, checking dimensions against their own measurements and the intended appliance and fixture placements, because this is the last practical opportunity to catch an error before material is cut; changes after shop drawings are approved are typically far more expensive and time-consuming than changes made during the design or drawing review stage.
Many custom shops schedule a final site verification measurement close to the production start date, particularly if there has been any construction or framing work in the space since the initial measurement, to confirm that actual dimensions still match the design before cutting begins. This step, sometimes skipped by less rigorous shops to save time, is worth insisting on for any project where walls or floors may have shifted or where other trades are actively working in the space, since a discrepancy of even a quarter inch across a long run of cabinetry can cause fit problems at installation.
Installation Considerations and Sequencing With Other Trades
Cabinet installation does not happen in isolation; it sits within a broader renovation sequence involving other trades, and poor coordination between cabinetry installation and other work is one of the most common sources of delay and rework in a remodeling project. Generally, rough electrical and plumbing work—running wires and pipes to their approximate final locations—needs to be completed before cabinet installation, since cabinets are built and installed around these fixed points, while electrical and plumbing finish work, such as installing outlets, switch plates, and faucet connections, typically happens after cabinets are set but before or alongside countertop installation.
Flooring sequencing varies by project and is worth discussing explicitly with a contractor: some projects install flooring before cabinetry so the floor runs continuously underneath, which can matter if cabinetry configuration might change in the future, while others install cabinetry first and finish flooring around it, which can save material cost since flooring is not needed under areas that will be permanently covered by cabinet boxes. Neither approach is universally correct, and the decision often depends on the flooring material, whether floating floors are being used, and the homeowner's plans for potential future cabinet layout changes.
Wall preparation matters more than it might seem; walls should be checked for level and plumb before cabinet installation begins, and a skilled installer will scribe cabinet panels to fit tightly against walls that are not perfectly straight rather than leaving visible gaps. Homeowners should ask their installer how they plan to handle any out-of-level conditions discovered during installation, since this is a normal part of nearly every real-world installation rather than a sign of a problem with the cabinetry itself.
Appliance coordination is another frequent point of friction: cabinet openings for a range, refrigerator, dishwasher, or built-in microwave need to be sized to the exact model being installed, including clearances the manufacturer specifies for ventilation or door swing, which means appliance selections should ideally be finalized before or during the shop drawing stage rather than left open, since a last-minute appliance substitution can require modifying an already-built cabinet opening.
Ventilation, Range Hoods, and Appliance Clearances
Range hood and ventilation planning intersects directly with cabinetry design, particularly for kitchens using an upper cabinet-integrated hood or a custom hood enclosure built to match the surrounding cabinetry. If a range hood will be built into or clad with cabinetry-matching material, this needs to be specified to the cabinetmaker early, since the hood insert's dimensions, ducting path, and required clearances above the cooking surface all affect how the surrounding cabinet boxes are constructed and where any structural bracing needs to go to support the hood's weight.
Manufacturer-specified clearances between a cooking surface and any cabinetry or hood above it exist for fire safety and should never be reduced to fit a design preference; these clearances vary by appliance and hood type and should be confirmed directly from the specific appliance manufacturer's installation instructions rather than assumed from a general rule of thumb, since ranges vary in output and hoods vary in required mounting height. A qualified installer or contractor should verify these clearances against the actual appliances being installed as part of the final design review, and any HVAC or venting work required for a hood that exhausts to the exterior should be coordinated with an HVAC contractor well before cabinet installation, since routing new exterior ductwork sometimes requires modifications to walls or ceilings that affect the cabinetry design itself.
Similarly, cabinetry adjacent to a range should account for heat exposure to the door and drawer fronts nearest the cooking surface; thermofoil and some laminate finishes are more vulnerable to heat-related warping in close proximity to a range than painted wood or plywood finishes, which is a relevant factor when choosing finishes for the specific cabinets flanking the cooking area, even if a different, less heat-sensitive finish is used elsewhere in the kitchen.
Sustainability, Certifications, and Indoor Air Quality
Cabinetry construction has real implications for indoor air quality because many adhesives and composite wood products historically off-gassed formaldehyde and other volatile organic compounds, particularly from urea-formaldehyde resins used in some particleboard and MDF products. Homeowners with concerns about indoor air quality—whether due to chemical sensitivity, young children in the home, or general preference—can ask cabinetmakers specifically about the formaldehyde emission standards their materials meet, since many manufacturers now offer or exclusively use composite wood products meeting low-emission formaldehyde standards, and some shops offer solid wood or formaldehyde-free adhesive options at a cost premium.
Wood sourcing certifications, such as those verifying that lumber comes from responsibly managed forests, are another consideration for homeowners prioritizing sustainability, and custom cabinetmakers working with solid wood species should be able to speak to where their lumber is sourced, though the availability of certified lumber varies by species and region. Finish products also vary in their environmental and health profile; water-based finishes generally have lower volatile organic compound content than traditional solvent-based lacquers and have improved significantly in durability in recent years, making them a reasonable option for homeowners wanting to minimize both off-gassing during application and ongoing chemical exposure in the finished cabinetry.
Homeowners interested in these factors should raise them directly and early with any cabinetmaker or shop being considered, since sourcing and formaldehyde-compliant materials sometimes require lead time to procure and are not always the shop's default specification unless requested. It is reasonable to ask for documentation or manufacturer specification sheets supporting any claims made about emissions standards or wood sourcing rather than relying on verbal assurance alone.
Maintenance, Longevity, and Getting the Most From Custom Cabinetry
Well-built custom cabinetry, properly maintained, can remain functional and attractive for several decades, but longevity depends on ongoing care that many homeowners are not told about at the time of purchase. Daily cleaning should use products appropriate to the specific finish—generally a soft cloth with mild soap and water for most painted, stained, and clear-coated wood finishes, avoiding abrasive scrubbing pads, ammonia-based cleaners, and excessive water, particularly around seams and edges where moisture can penetrate the substrate beneath the finish. Manufacturers and cabinetmakers typically provide specific care instructions for their particular finish system, and these should be kept and followed rather than defaulting to whatever household cleaner happens to be on hand.
Hardware adjustment is a normal and expected part of cabinetry maintenance rather than a sign of poor-quality installation; most concealed European-style hinges include adjustment screws that allow the door to be re-aligned as the cabinet settles slightly over time or as seasonal humidity causes minor wood movement, and homeowners should feel comfortable making these minor adjustments themselves or asking an installer to demonstrate how, since re-tightening and realigning hinges periodically extends the life of both the hinge and the door.
Humidity control within the home has a meaningful effect on wood cabinetry longevity, since large swings in humidity cause wood components to expand and contract, which over years can stress joints, cause slight door warping, or lead to visible seams opening at miter joints in molding. Maintaining relatively stable indoor humidity, particularly in climates with significant seasonal swings, helps protect the investment, and this is a reasonable additional consideration when planning HVAC and humidity control for a home undergoing a larger renovation that includes new cabinetry.
Finally, homeowners should retain all documentation provided by the cabinetmaker—material specifications, finish formulas or product names, warranty information, and touch-up paint or stain if provided—since this information becomes valuable if a repair, touch-up, or future matching addition is ever needed, and it is often difficult or impossible to recreate an exact finish match years later without this original documentation.
Common Mistakes to Avoid When Planning Custom Cabinetry
A recurring set of mistakes appears across custom cabinetry projects regardless of budget level, and being aware of them in advance helps homeowners avoid costly corrections. Designing around current appliances without confirming exact model dimensions, then discovering during installation that a replacement appliance purchased later has different clearance requirements, is a common and avoidable error; appliance selections should be finalized and their specification sheets shared with the cabinetmaker before shop drawings are produced.
Choosing a door style or finish based solely on a photograph or showroom display without viewing a physical sample in the actual room's lighting is another frequent regret, since lighting conditions, adjacent countertop and flooring colors, and overall room proportions all affect how a finish reads in reality compared to an isolated photograph. Underestimating how much storage is actually needed, often because the functional inventory step was skipped or rushed, leads to households outgrowing their new cabinetry within a few years despite a significant investment, which is why the early planning stages described earlier in this guide deserve real time and attention rather than being treated as a formality before the "real" design work begins.
Failing to plan for electrical and lighting needs before cabinet boxes are built, then trying to retrofit outlets or under-cabinet lighting into finished cabinetry, creates both cosmetic compromises and unnecessary added cost. Overlooking finished side panels on islands, peninsulas, or any cabinet run visible from an angle other than straight-on is a detail that is easy to miss during design but glaring once installed. Finally, choosing the lowest-cost quote without understanding what materials and construction methods it reflects can result in cabinetry that looks similar to a higher-quality option in a showroom but fails prematurely once installed and in daily use; the material and construction sections earlier in this guide exist specifically to help homeowners ask the right questions and compare quotes on equal terms rather than by price alone.
Bringing It All Together: A Practical Planning Checklist
Approaching a custom cabinetry project in a clear sequence reduces the chance of costly mistakes and produces a result that genuinely fits how a household lives, not just how a showroom display looks. Begin with the functional inventory described early in this guide, cataloging every category of item that needs storage and how it is used, before looking at a single door style or finish sample. Use that inventory to inform the layout, working through traffic flow, work zones, and corner solutions with a designer or cabinetmaker who understands the actual dimensions and constraints of the space through an accurate site measurement.
Decide on box construction style and material with durability in mind first, favoring plywood over particleboard for box construction and understanding the tradeoffs of face-frame versus frameless construction based on the desired storage capacity and aesthetic. Select door material, style, and finish based on how the space will be used daily and the home's overall architectural character, using physical samples in the actual room's lighting rather than photographs or screen renderings alone. Specify hardware, particularly drawer slides and hinges, based on the actual weight and frequency of use for each cabinet and drawer rather than a blanket standard throughout.
Coordinate lighting, ventilation, appliance selections, and countertop material with the cabinetmaker before shop drawings are finalized, since these decisions affect the physical construction of the boxes themselves. Review shop drawings carefully against personal measurements and appliance specifications before production begins, and confirm whether a final site verification measurement will occur before cutting starts. Plan installation sequencing with other trades explicitly, rather than assuming coordination will happen automatically, and ask installers directly how they will handle any out-of-level or out-of-square conditions discovered on site.
Finally, request and retain full documentation of materials, finishes, and warranty terms once the project is complete, and commit to the ongoing maintenance practices appropriate to the chosen finish and hardware. Custom cabinetry represents a substantial investment of both money and decision-making effort, but a homeowner who works through each of these stages deliberately, asking direct questions at every step rather than deferring entirely to a showroom's default recommendations, ends up with cabinetry that performs as well in daily use ten years from now as it looks on the day it is installed.