
Planning · 35 min read
Planning a Design-to-Completion Remodel
Build a clearer process for scope, selections, communication, sequencing, and the thousands of details between concept and completion.
Excerpt: A design-to-completion remodel promises a seamless path from first sketch to final walkthrough, but the space between those two moments is where projects succeed or unravel. This guide walks homeowners through every phase of a full remodel — planning, budgeting, design development, permitting, construction, and closeout — with a sustained focus on the small decisions and details that determine whether the finished result feels intentional or improvised.
Understanding What "Design-to-Completion" Actually Means
The phrase "design-to-completion" gets used loosely in the remodeling industry, and homeowners often assume it simply means hiring one company to handle everything. That is part of it, but the deeper meaning has to do with continuity of information. In a fragmented remodel — where a homeowner hires a designer, then separately hires an architect, then separately hires a contractor, then separately hires trades — every handoff is an opportunity for details to get lost. The designer's vision for a tile pattern might not survive translation into construction drawings. The architect's window placement might not account for how the electrician planned to route a switch leg. Each new party inherits assumptions they weren't part of forming.
A true design-to-completion process, by contrast, is built around a single continuous thread of decision-making that runs from the earliest conversations about how a family uses a space all the way through the final punch list. That doesn't mean one person does every task; it means the information travels intact. The same references, measurements, material selections, and reasoning that shaped the design are the ones the construction team uses to build. When this thread breaks, homeowners notice it in the finished product as small inconsistencies: a light fixture centered on the wrong axis, a backsplash that doesn't quite align with upper cabinets, a floor transition installed in the wrong location.
Understanding this distinction matters before you sign any contract, because it changes what questions you ask. Instead of asking "Do you handle design and construction?" you should be asking "How does information move from the design phase into the field, and who is responsible for catching conflicts before they become problems?" The answer to that question tells you more about how your project will actually run than any portfolio photo will.
Defining Your Scope Before You Talk to Anyone
Homeowners frequently reach out to designers or contractors with a vague sense of dissatisfaction — "the kitchen doesn't work," "we need more space," "it feels dated" — without having translated that feeling into a defined scope. This is understandable; most people don't remodel houses for a living and don't have a framework for articulating what needs to change. But walking into early meetings without a working scope wastes time and money, because every professional you talk to will spend billable hours helping you figure out what you actually want, and each one may nudge you toward a different scope based on their own specialty.
Before your first meeting, sit down and write out, in plain language, every problem you're trying to solve. Not solutions — problems. "We only have one usable countertop workspace and it's blocked by the refrigerator door" is a problem. "We need an island" is a solution, and it may or may not be the right one once someone evaluates your layout. Separating problems from solutions at this stage keeps you open to better ideas and prevents you from anchoring on a Pinterest image that may not suit your actual house.
Next, sort your problems into three categories: things that must be fixed, things that would be nice to fix if the budget allows, and things you've noticed but can live with. This triage becomes the backbone of every later conversation about scope creep, and scope creep is the single most common reason remodels go over budget and past schedule. When a contractor asks mid-project whether you want to also address the hallway closet while the walls are open, you'll have an existing framework for answering instead of making an emotional decision in the moment.
Finally, write down your non-negotiables around timeline and disruption. Are you living in the home during construction? Do you need at least one working bathroom and kitchen area at all times? Is there a hard deadline, like a family event or a school year starting? These constraints shape the entire sequencing of the project and need to be on the table from day one, not discovered halfway through when the contractor proposes a schedule that doesn't work for your life.
Setting a Realistic Budget That Includes the Invisible Costs
Most remodeling budget conversations focus on visible finishes — cabinets, countertops, flooring, fixtures — because those are the choices homeowners find exciting and tangible. But a disproportionate share of remodel costs, particularly in older homes, goes toward things nobody sees: electrical panel upgrades, plumbing rerouting, structural reinforcement, insulation, mold remediation, and code-required updates that only surface once walls are opened. If your budget doesn't reserve room for these invisible costs, either the project will run over budget or, worse, those necessary items will get skipped to protect the finish budget, leaving you with a beautiful surface over unresolved problems.
A workable rule of thumb is to treat your finish-level budget and your contingency budget as two separate line items from the start, rather than folding contingency into a vague overall number. Many experienced remodelers recommend setting aside somewhere in the range of 10 to 20 percent of the total project cost as contingency, with older homes and homes with unknown structural history trending toward the higher end. This isn't a pessimistic pad — it's a realistic acknowledgment that nobody can see inside a wall until it's opened.
It also helps to separate your budget into phases that mirror the construction sequence: site and demolition, structural and mechanical rough-in, insulation and drywall, finish carpentry and cabinetry, countertops and tile, plumbing and electrical fixtures, paint, and final details like hardware and trim. Assigning rough percentages to each phase, even loosely, helps you sanity-check quotes as they come in. If a contractor's finish-carpentry line seems unusually low relative to everything else, that's worth a conversation before you sign anything, not after the cabinets are already ordered.
Don't forget the costs that fall outside the construction contract entirely: permit fees, design fees, temporary housing or storage if you're relocating during construction, temporary kitchen setups, increased homeowners insurance during the build, and the cost of replacing anything damaged or lost during the process. These line items are easy to forget because they don't show up in a contractor's proposal, but they are real costs of the project and should be part of your overall financial plan.
Choosing the Right Team Structure for Your Project
There are several common team structures for a full remodel, and the right one depends on the complexity of your project, your appetite for coordination, and your local market. The first is the design-build firm, where one company employs or closely partners with both the design staff and the construction crew, offering the continuity discussed earlier. The second is the traditional architect-plus-contractor model, where you hire a design professional to develop plans and then separately bid those plans out to contractors. The third is an interior-designer-led model, common on projects that are more finish-focused than structural, where a designer manages material selection and coordinates with a contractor of your choosing or theirs.
Each model has trade-offs. Design-build firms tend to offer smoother communication and faster decision-making because design and construction happen under one roof, but you lose the competitive bidding process that can come from shopping plans to multiple contractors, and you're trusting one company's judgment on both design quality and construction quality. The architect-plus-contractor model can produce more rigorous, code-vetted drawings and lets you competitively bid the construction phase, but it requires you, the homeowner, to serve as the connective tissue between two parties who may not have worked together before — and that connective role is exactly where details get lost if you're not careful. The designer-led model works well for cosmetic and finish-heavy remodels but can struggle on projects that involve structural changes, since design decisions and construction realities need tighter integration than that model typically provides.
Whichever structure you choose, ask specifically how conflicts between design intent and field conditions get resolved. Who has the authority to approve a field change? Is there a documented process, or does it happen through phone calls and text messages that nobody writes down? Verbal changes are one of the most common sources of disputes at the end of a project, because memories of what was said differ, and neither party has a paper trail to point to.
Vetting Contractors and Designers Beyond the Portfolio
A beautiful portfolio tells you that a contractor or designer has produced beautiful results at least once, under conditions you don't know anything about. It does not tell you how they behave when something goes wrong, how they communicate under schedule pressure, or how carefully they manage the unglamorous middle of a project. Vetting for those qualities requires different questions than "can I see your past work."
Ask for references from projects completed at least a year ago, not just recent ones, so you can ask homeowners how things held up over time — whether the tile grout is cracking, whether the paint has held its color, whether callbacks for warranty issues were handled promptly. Ask specifically about a project that didn't go according to plan and how it was resolved; every experienced professional has had at least one, and their answer reveals more about their character than a flawless story would.
Request to see an actual sample of their documentation: a sample contract, a sample change order form, a sample schedule. The quality and specificity of these documents is a strong predictor of how organized the actual project will be. A contract that vaguely states "kitchen remodel per attached plans" without detailed specifications for materials, allowances, and inclusions is a red flag, because vague contracts create the conditions for disputes over what was actually promised.
Check licensing and insurance directly with your state or local licensing board rather than taking a business card at face value. Confirm that the contractor carries both general liability insurance and workers' compensation insurance, and ask for a certificate of insurance naming you, if your state or your own homeowner's policy requires it. This is not paranoia; it's a basic safeguard against being held liable for an injury that happens on your property during construction.
Finally, pay attention to how a prospective team communicates during the sales and estimating process, because that behavior is the best preview you'll get of how they'll communicate once you're under contract and less of a priority to win over. If a company is slow to respond, vague about specifics, or reluctant to put things in writing before you sign, that pattern rarely improves after the ink is dry.
Translating Lifestyle Needs Into Design Requirements
Good design starts with how people actually live, not with what looks appealing in a magazine. Before any layout is drawn, take time to document the specific routines your household follows in the spaces being remodeled. In a kitchen, this means walking through how meals are actually prepared: who cooks, whether multiple people cook at once, where groceries get unloaded, where the recycling and trash live, whether kids do homework at the counter while dinner is made. In a bathroom, it means thinking through morning routines when multiple people need access at the same time, storage for medications and toiletries, and whether the space needs to accommodate aging in place over the coming years.
This documentation process, sometimes called a needs assessment, produces requirements that are far more useful to a designer than aesthetic preferences alone. A designer can work with "we need two people to be able to use the counter and sink area at the same time without colliding" in a way they cannot work with "we want it to feel open." Both types of input matter, but the functional requirements should come first, because they constrain the layout options, and aesthetics are then applied within those constraints.
It also helps to think in terms of frequency and reach. Items used daily should be stored in the most accessible locations — eye level to waist level, close to where they're used. Items used weekly can go a bit further afield. Items used seasonally can be stored in less convenient locations like high cabinets or a garage. Walking through your current kitchen or bathroom and sorting your existing items by frequency of use, before design even begins, gives your designer real data to work with rather than guesswork, and it often reveals storage needs you hadn't consciously articulated.
Don't skip this exercise even if you're working with a design professional you trust. The most common source of post-move-in regret in remodels isn't the tile color or the cabinet style — it's discovering that a drawer is in the wrong place for how you actually move through the room, or that there's nowhere to set down mail and keys by the door you actually use. These are lifestyle details, and they only surface if someone asks the right questions early enough to still change the layout.
Developing the Design in Layers, Not All at Once
A common mistake in the design phase is trying to finalize everything simultaneously — the layout, the finishes, the lighting plan, the hardware — in one long marathon of decisions. This approach overwhelms most people and leads to decision fatigue, where the choices made late in the process get less careful attention than the ones made early, simply because the homeowner is exhausted. A better approach is to develop the design in deliberate layers, each one building on a locked-in decision from the layer before.
The first layer is the layout: where walls move, where plumbing and major appliances go, how traffic flows through the space. This layer should be fully resolved and, ideally, tested against your daily routines — walk through the proposed layout on paper or with painter's tape on the existing floor before committing — before you move to the next layer. Changing a layout after finishes are selected is expensive and demoralizing; changing it while it's still lines on paper costs nothing.
The second layer is the architectural shell: window and door placement, ceiling height changes, structural elements that will be visible in the finished space, like exposed beams. These decisions affect how light enters the space and how the room will feel, and they need to be locked before finish selections begin, because finishes are chosen in relation to these fixed elements, not the other way around.
The third layer is finishes and fixtures: flooring, countertops, cabinetry, tile, plumbing fixtures, lighting fixtures, hardware, and paint. This is the layer most homeowners find most enjoyable, and it's tempting to jump straight here, but doing so before the first two layers are settled means you risk selecting beautiful materials for a layout that later has to change, wasting both money and decision-making energy.
The fourth and final layer is the details that pull everything together: outlet and switch placement, trim profiles, transition strips between flooring materials, the exact height of a pot filler, the reveal gap around a cabinet panel. These details are easy to dismiss as minor, but they are frequently what separates a remodel that feels custom and considered from one that feels generic, and they deserve dedicated attention rather than being decided on the fly by whoever happens to be on site that day.
Creating a Detailed Materials and Finishes Schedule
One of the most effective tools for preventing details from slipping through the cracks is a materials and finishes schedule — a single document, ideally a spreadsheet, that lists every material and fixture in the project, its exact specification, its source, its cost, its lead time, and who is responsible for ordering it. This document should exist before construction starts and should be treated as a living reference that both the design side and the construction side consult constantly.
For each item, the schedule should include enough detail that anyone could reorder the exact same product without guessing: manufacturer, model or SKU number, color or finish name, size or dimensions, and the specific vendor or supplier. "White subway tile" is not a specification; "3x6 inch matte white ceramic subway tile, [manufacturer], [SKU], set with 1/16 inch grout joint" is a specification. The difference matters enormously when a tile breaks mid-installation and needs to be reordered, or when a bathroom needs a matching accessory years later.
Lead times deserve particular attention in this schedule, because they are one of the most common causes of schedule delay in remodels. Custom cabinetry, certain tile imports, and specialty plumbing fixtures can have lead times of many weeks or months, and if these items aren't ordered early enough, the entire construction schedule can stall waiting for a single delivery. Build your materials schedule backward from your desired completion date, working out when each item needs to be ordered to arrive in time for its installation phase, with a buffer for shipping delays and damaged-in-transit replacements.
This schedule also becomes your best tool for managing allowances. Many remodeling contracts include allowances — set dollar amounts budgeted for categories like lighting fixtures or plumbing fixtures, to be finalized once selections are made. Tracking actual selections against allowance amounts in your materials schedule, updated as choices are made, prevents the unpleasant surprise of discovering at the end of the project that your selections ran well over the allowances baked into your contract.
Understanding Permits, Inspections, and Code Requirements
Permitting can feel like a bureaucratic obstacle standing between you and your remodel, but it exists to catch exactly the kind of hidden problems that cause serious harm down the road: unsafe electrical work, structural elements that can't bear the loads placed on them, plumbing that doesn't drain or vent properly, and life-safety issues like inadequate egress from bedrooms. Skipping required permits to save time or money is a decision that can come back to haunt you at resale, when a buyer's inspector or the title company discovers unpermitted work, or in the event of an insurance claim, when a carrier may deny coverage for damage connected to unpermitted construction.
Before construction begins, ask your contractor or architect exactly which permits the project requires — building, electrical, plumbing, mechanical — and who is responsible for pulling them. In most jurisdictions, the contractor of record pulls permits under their license, but in owner-builder situations or certain design-build arrangements, responsibility can shift, so clarify this explicitly rather than assuming.
Understand the inspection schedule tied to your permits, because inspections typically happen at specific milestones — after rough framing, after rough electrical and plumbing but before walls are closed, and at final completion — and work cannot proceed past certain points until an inspection is passed. This is one of the built-in checkpoints that protects the quality of a design-to-completion project: an inspector is, in effect, a second set of eyes verifying that what's in the wall matches what code requires, independent of your contractor's own quality control.
If your remodel involves any change to the footprint of the house, changes to egress windows, or work near property lines, check on zoning and setback requirements early, since these can affect what's even possible before design gets very far. Historic districts and homeowners' associations may add another layer of approval requirements, sometimes with their own aesthetic guidelines that constrain exterior material and color choices. Identifying all of these approval bodies at the start of the project, rather than discovering a new one mid-permit-application, prevents costly redesign work later.
Building a Realistic Schedule With Buffer for the Unexpected
Homeowners often receive a schedule from their contractor that reads as a straight line from demolition to move-in, with each trade following neatly after the last. Real remodels rarely run that cleanly, and a schedule that doesn't account for the normal friction of construction sets everyone up for disappointment. A more realistic schedule builds in buffer time at key points where delays are common: after demolition, when unforeseen conditions are most likely to be discovered; before major deliveries, in case of shipping delays; and before each inspection, in case a reinspection is required.
Ask your contractor to walk you through the schedule trade by trade, explaining which tasks must happen sequentially and which can happen in parallel. Understanding this logic helps you recognize early when the project is falling behind, rather than only noticing at the end when the cumulative delay has become significant. If framing is supposed to take a week and it's still ongoing after two, that's worth a direct conversation immediately, not a wait-and-see approach.
Weather, holidays, and trade availability all affect schedules in ways that are hard to predict precisely but easy to plan around in general terms. If your remodel spans a holiday season, expect slower response times from suppliers and possibly reduced crew availability. If your project depends on exterior work like roofing or siding, build in the possibility of weather delays, particularly in regions with unpredictable seasons.
Communicate your own scheduling constraints clearly and early, and revisit them as the project progresses. If you have a non-negotiable date — a holiday gathering, a home sale closing, a new baby's due date — make sure your contractor understands not just the date but the consequence of missing it, so that date can be factored into sequencing decisions, like whether to prioritize finishing one usable bathroom before starting on a second.
Managing Communication So Nothing Falls Through the Cracks
Communication breakdowns are behind more remodeling disputes than any technical construction failure. A homeowner mentions an idea in passing to a subcontractor on site, the subcontractor assumes it's approved, and by the time the general contractor or designer finds out, the work is done and needs to be redone. Or the reverse happens: a homeowner assumes a decision was communicated because they told the designer, but the designer never passed it along to the site supervisor, and the wrong material gets installed.
The fix for this is structural, not just about being a better communicator individually. Establish, before construction begins, a single channel and a single point of contact for all project communication — typically a project manager or lead on the contractor's side — and commit to funneling all decisions through that channel rather than through whoever happens to answer the phone or be on site that day. This doesn't mean you can't talk to the tile installer directly about a question, but any decision that comes out of that conversation should be confirmed back through the official channel in writing.
Set a recurring check-in cadence, whether that's a weekly walkthrough, a weekly phone call, or a shared project management app where updates get logged daily. Recurring, predictable communication reduces the anxiety that comes from not knowing what's happening, and it creates natural checkpoints where small misunderstandings can be caught before they compound into expensive mistakes.
Put every decision in writing, even ones that feel obvious or minor in the moment. This can be as simple as a follow-up text or email after a verbal conversation: "Confirming we discussed moving the pendant lights six inches toward the sink — please let me know if that's not what you understood." This habit costs almost nothing and creates a paper trail that protects everyone if memories diverge later, which they inevitably do over the course of a multi-month project.
Handling Change Orders Without Losing Control of Budget or Timeline
Change orders are a normal and expected part of remodeling, not a sign that something has gone wrong. Existing conditions get discovered, homeowners refine their preferences as they see the space taking shape, and sometimes better options become available mid-project. The problem isn't that changes happen — it's when they happen informally, without a documented process, leaving both budget and schedule impact unclear until it's too late to make an informed decision.
Insist on a formal change order process from the start of your contract, and understand it before you need it. A proper change order documents exactly what is changing, the cost impact, the schedule impact, and requires signature from both parties before the change is executed. If a contractor proposes proceeding with a change based on a verbal okay "to keep things moving," ask them to provide at least a brief written confirmation of scope and cost before work begins, even if the full paperwork follows later — a habit that protects you far more than it slows the project down.
When a change order is proposed, take a moment before approving it to ask how it affects everything downstream: does this change affect any other trade's work, does it affect the schedule for materials already ordered, does it affect any other design decision that was made assuming the previous condition. Contractors managing a project well should be able to answer these questions, and if they can't, that's a sign the change hasn't been fully thought through yet.
Track every change order against your original budget and schedule in the same document where you're tracking your finishes schedule and allowances, so you always have a real-time picture of where the project stands relative to where it started. Watching the gap between original budget and current running total grow gradually, in small increments you understand and approved, is very different from discovering a large unexplained gap at the final invoice.
Coordinating Trades So Sequencing Errors Don't Create Rework
A remodel involves a sequence of trades working in careful order — framing before electrical, electrical and plumbing rough-in before insulation, insulation before drywall, drywall before paint and trim — and the coordination between these trades is where a huge amount of quality and cost risk lives. When trades are poorly sequenced or poorly coordinated with each other, the result is rework: a wall gets closed up before an inspector sees the wiring, or a plumber has to cut into freshly hung drywall because a vent location wasn't communicated to the framer, or tile gets installed before the exact model of a vessel sink is confirmed, making the countertop cutout wrong.
Good sequencing depends on accurate, shared information about exact product dimensions before rough work begins, not after. This circles back to the value of finalizing your materials and fixtures schedule early: the plumber roughing in supply lines needs to know the exact faucet model to get the spacing right, the electrician needs to know the exact under-cabinet lighting product to run the right wiring, and the framer needs to know the exact dimensions of a specialty window before framing the rough opening. If these selections are still undecided when rough work happens, either the schedule stalls waiting for decisions, or rough work proceeds on assumptions that may turn out wrong.
Ask your project manager how they handle trade coordination meetings — whether trades communicate directly with each other on site, whether there's a pre-installation meeting before major phases, and how conflicts between trades (for example, a duct run that interferes with a planned light fixture location) get identified and resolved. On complex projects, some form of coordinated drawing review, even informal, where the mechanical, electrical, and plumbing plans are overlaid to check for physical conflicts before construction, can save significant rework.
As a homeowner, you can support good sequencing by making your decisions on schedule rather than treating deadlines for selections as flexible. Every finish or fixture decision has a real deadline tied to when that item needs to be ordered or installed for the schedule to hold, and delaying a decision past that point pushes the entire schedule, or forces the crew to proceed on an assumption you'll then be asked to accept or pay to change.
Protecting Quality Through Site Visits and Documentation
Even with a trustworthy team, regular site visits are one of the most valuable things you can do to protect the quality of your remodel. Seeing work in person, at each major phase, lets you catch issues while they're still easy and cheap to fix, rather than after finishes have covered them up. This isn't about second-guessing your contractor's expertise on every technical decision; it's about staying engaged enough to ask informed questions and verify that what's being built matches what was agreed to.
Before drywall goes up is one of the most important site visits you can make, because it's your last chance to see the rough electrical, plumbing, and framing before it's permanently hidden. Bring your plans and your finishes schedule, and physically check outlet and switch locations against your expectations, confirm that light fixture boxes are positioned where you intended, and verify that any structural changes look the way you pictured them. Take photographs of everything — every wall, every angle — before it's closed up. These photographs are invaluable if you ever need to locate a pipe or wire for a future project, and they're also useful documentation if a dispute arises about what was actually built.
At the tile and cabinetry installation phase, visit while the work is in progress rather than only after it's finished, since some issues — like a slightly uneven cabinet reveal or a tile pattern drifting off-center — are much easier to correct mid-installation than after grout has cured or cabinets have been fully secured and connected to countertops.
Keep a running log of your own observations from each site visit, dated, with photos attached, separate from whatever documentation your contractor maintains. This isn't about creating an adversarial paper trail; it's about having an accurate memory of the project's progress that you can refer back to, since it's easy to lose track of exactly when a particular decision was made or a particular issue was raised over a project that spans months.
Managing Living Through Construction Without Sacrificing Daily Life
If you're staying in your home during a remodel, the disruption to daily routines deserves as much planning as the construction itself. Before demolition begins, walk through exactly how your household will function without the space being renovated: where will meals be prepared if the kitchen is out of commission, which bathroom will the whole family use if one is being remodeled, where will dust-sensitive items like electronics and clothing be stored to protect them from construction debris.
Setting up a temporary kitchen, even a simple one with a microwave, a small refrigerator, and a folding table in a spare room or garage, can meaningfully reduce the stress of a kitchen remodel that runs for weeks or months. Establish this temporary setup before demolition starts, not scrambling to assemble it the first night without a working kitchen.
Dust and debris containment deserves explicit discussion with your contractor, especially if household members have respiratory sensitivities or if you have pets or small children in the home. Ask what containment measures will be used — plastic sheeting, negative air pressure machines, dedicated pathways for construction traffic that avoid living areas — and hold your contractor to those measures throughout the project, not just at the start when everyone is being extra careful.
Think through practical logistics like which entrance the crew will use, where materials and dumpsters will be staged, what hours work will occur, and how noise will be managed if anyone in the household works from home or has particular sensitivity to disruption. Establishing these expectations explicitly at the start, ideally in writing as part of your contract or a project agreement, prevents daily friction that can erode an otherwise good working relationship over the course of a long project.
Finally, be honest with yourself and your family about the emotional toll of living in a construction zone. Even well-run remodels are disruptive, and giving yourself permission to feel frustrated by the mess and disorder, while still trusting the process, is healthier than either suppressing that frustration or letting it derail your relationship with your project team over normal, expected friction.
Reviewing Shop Drawings and Samples Before Fabrication
Before custom items like cabinetry, countertops, or millwork are fabricated, you should have the opportunity to review shop drawings — detailed technical drawings that specify exact dimensions, materials, and construction details for the custom pieces in your project. This review step is one of the most overlooked details in remodels, and skipping it is a common source of expensive rework, because once a custom cabinet is built to the wrong dimension, there's no simple fix; it has to be rebuilt.
When reviewing shop drawings, check every dimension against your actual design intent, not just against the general concept. Confirm cabinet heights, especially at transitions like a cooktop hood or a window above a sink, where a few inches in either direction changes the whole visual proportion of the space. Confirm door and drawer configurations match what you selected, since a drawing can look correct at a glance while having drawers and doors swapped from your intended layout.
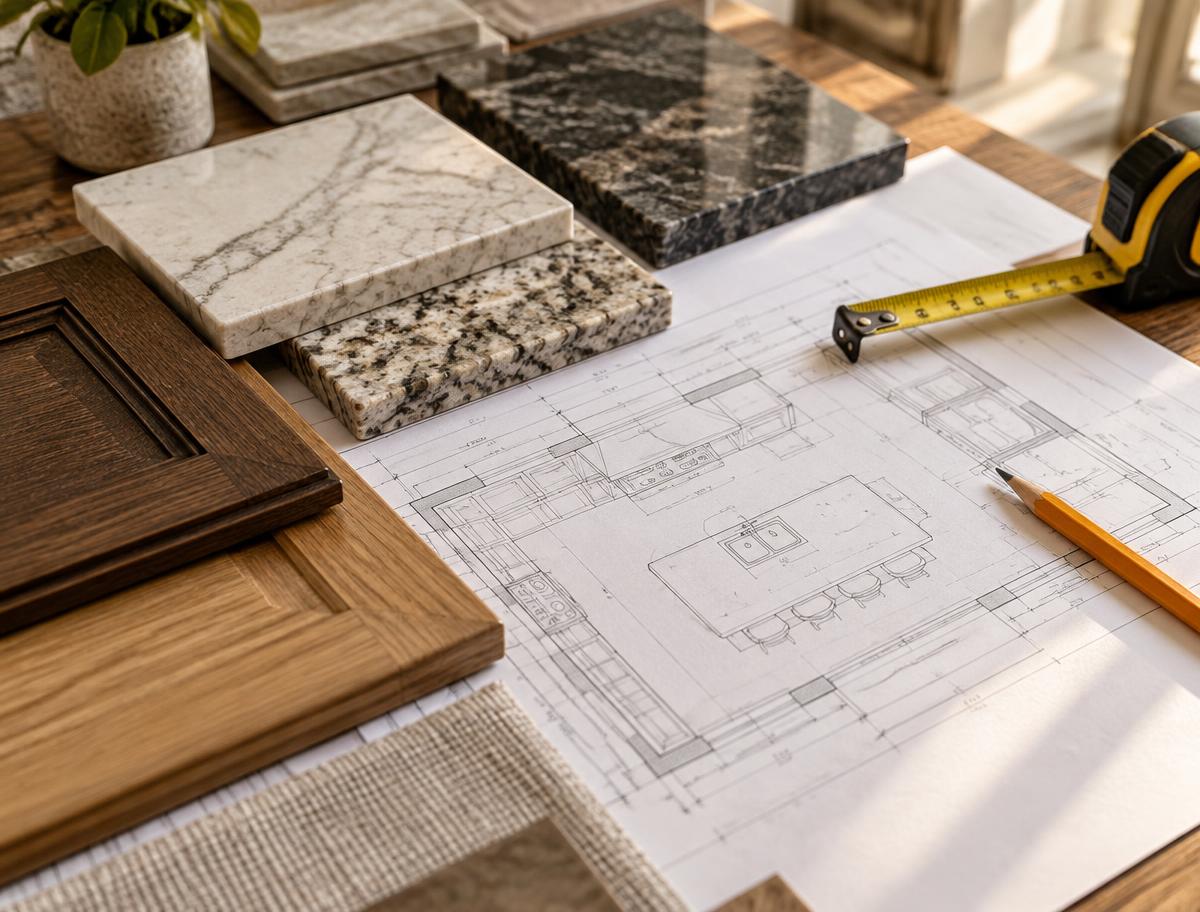
Request physical samples of finish materials at full or near-full scale whenever possible, rather than relying on small swatches or digital renderings. Stone slabs in particular vary significantly piece to piece, and viewing an actual slab, or at minimum a large sample cut from your specific slab, before fabrication prevents the disappointment of installed countertops that don't match the swatch you approved months earlier. The same logic applies to tile, where dye lots can vary between batches, and to paint, where colors read very differently under your home's actual lighting than they do on a small chip under store lighting.
If your project includes custom millwork like built-in shelving or a mantel, ask to see a mockup or at least a detailed drawing showing exact reveal gaps, joinery approach, and how the piece will interface with existing walls and trim. These are exactly the kind of details that separate custom work that looks intentional from custom work that looks like an afterthought, and they are far easier to correct on paper than after the piece has been built and installed.
Coordinating Lighting Design as Its Own Discipline
Lighting deserves to be treated as a distinct design discipline within your remodel rather than an afterthought handled by whichever electrician is on site, because lighting affects how every other design decision reads once the project is complete. A beautifully selected countertop or tile pattern can look flat and lifeless under poor lighting, while a modestly finished room can feel warm and considered under a well-designed lighting plan.
Think through lighting in layers: ambient lighting that provides overall illumination, task lighting focused on specific work areas like a kitchen counter or a bathroom vanity, and accent lighting that highlights architectural features or creates mood. A common mistake is relying on a single ceiling fixture or a grid of recessed cans to handle all three functions at once, which tends to produce flat, shadowless light that makes spaces feel more like a retail store than a home.
Pay close attention to color temperature, measured in Kelvin, and consistency across fixtures in the same space. Mixing warm and cool color temperatures in one room, even unintentionally by buying bulbs from different manufacturers over time, creates a subtly uncomfortable visual effect that many people notice without being able to articulate why the room feels off. Standardize on a color temperature across each space, and confirm that any dimmable fixtures use dimmer switches actually rated for their specific bulb type, since mismatched dimmers cause flickering and premature bulb failure.
Switch and control placement is a detail worth walking through physically before wiring is finalized. Stand in each doorway and each key location in the room and think through which lights you'd want to control from that spot. Three-way and four-way switching, where a single light can be controlled from multiple locations, adds modest cost during rough-in but meaningfully improves daily usability, and it is far more expensive to add after walls are closed.
Selecting Hardware, Trim, and the Connective Details
Hardware, trim profiles, and other connective details are frequently the last decisions made in a remodel, often under time pressure as the project nears completion, and as a result they get less careful attention than the big-ticket items decided earlier. This is unfortunate, because these details are disproportionately visible in daily use — you touch a cabinet pull and a door handle every single day, far more often than you consciously notice a countertop material.
Select hardware finishes with intention rather than defaulting to whatever matches the plumbing fixtures by coincidence. Mixing metal finishes thoughtfully — for example, a warm brass for cabinet hardware paired with a matte black for plumbing fixtures — can look sophisticated, but mixing finishes carelessly, with three or four different metals scattered around a single room without any organizing logic, tends to look unplanned. Decide on a hardware finish strategy early enough that it can inform your other selections, rather than scrambling to make it work with everything else already chosen.
Trim profiles — baseboard, casing around doors and windows, crown molding if used — should be selected to match the architectural character of your home rather than chosen purely on personal taste in isolation. A simple, low-profile baseboard suits a minimalist or contemporary remodel, while a more substantial, detailed profile suits a traditional or historic home. Mismatched trim scale relative to a room's proportions and architectural style is a subtle but common reason a finished remodel doesn't feel as polished as its individual materials would suggest.
Pay attention to transitions: where one flooring material meets another, where tile meets a wood threshold, where a countertop meets a backsplash, where a cabinet panel meets a wall. These transition points require their own specific decisions about materials and reveal gaps, and they are exactly the kind of detail that gets improvised on site if they weren't planned in advance. Walk through your plans specifically looking for every point where two materials meet, and confirm a plan exists for each one before installation begins.
Preparing for the Final Walkthrough and Punch List
The final walkthrough is your structured opportunity to identify anything that needs correction before you consider the project complete, and treating it with the same care you gave to earlier phases of the project pays off. Schedule the walkthrough with enough daylight remaining to properly inspect finishes, since poor lighting hides exactly the kind of small imperfections — an uneven paint line, a slightly proud tile edge — that you want to catch.
Bring your original design documents, your materials and finishes schedule, and your contract to the walkthrough, and go through the project room by room, checking installed materials against your specifications rather than relying on memory. Test every functional element: run every faucet, flush every toilet, open and close every door and drawer, turn on every light and switch, run appliances through at least one cycle. Functional problems are often easier to identify through active testing than through visual inspection alone.
Document every item that needs correction in a written punch list, with enough specificity that there's no ambiguity about what needs to happen — not "fix paint in bedroom" but "touch up paint drip on north wall of bedroom, approximately three feet left of window." Assign a reasonable timeline for punch list completion, and agree in writing on how final payment will be handled relative to punch list completion, since holding a reasonable portion of final payment until punch list items are resolved is standard practice and gives everyone continued incentive to finish the small details well.
Don't rush the walkthrough because you're eager to move back into the space or because the project has already run long and everyone is tired of it. The small items identified and corrected at this stage are far easier to fix now, while the crew and their tools and materials are still mobilized, than they will be months later when you notice them during ordinary life and have to schedule a separate service call.
Establishing a Maintenance Plan to Protect Your Investment
A remodel doesn't end at the final walkthrough; how you maintain the finished space over the following years determines whether it continues to look and function as intended or degrades faster than it should. Before your project team disperses, ask for a maintenance guide covering the specific materials installed in your home: what cleaning products are safe for your particular countertop material, how often grout should be sealed, what maintenance schedule your specific flooring material requires, and any manufacturer warranty terms and registration requirements for appliances and fixtures.
Collect and organize all warranty documentation, product manuals, and care instructions in a single location, whether that's a physical binder or a digital folder, along with your finishes schedule that documents exact product specifications. This becomes an invaluable resource years from now when a fixture needs replacement or a repair is needed and you want to match existing materials rather than start over with new selections.
Understand which elements of your remodel require periodic professional attention versus which can be maintained through your own routine care. Natural stone countertops typically need periodic resealing, grout lines benefit from periodic resealing to resist staining, and certain wood finishes may need refreshing over time. Building these maintenance tasks into your household's regular calendar, the same way you'd schedule HVAC servicing, protects the investment you've made rather than letting deferred maintenance gradually undo the quality of the completed work.
Keep contact information for your contractor and key subcontractors even after the warranty period, since a relationship built over a successful project can be valuable for future smaller projects or repairs, and a contractor familiar with your home's specific history and construction details is often better positioned to handle future work than someone starting from scratch.
Learning From the Process for Future Projects
Whether this is your first remodel or one of several you've undertaken, treating the completed project as a source of lessons for the future pays dividends, especially if you anticipate future phases of work on your home or expect to take on another remodel down the road. Shortly after completion, while the details are still fresh, write down what worked well and what you'd do differently: which decisions you're glad you made carefully, which decisions you wish you'd given more attention, where communication broke down and what would have prevented it, and which team members you'd want to work with again.
Reflect honestly on where your own decision-making contributed to any friction in the process. Did you delay selections past the point where they could be made without schedule impact? Did you introduce scope changes mid-project without fully considering downstream effects? This isn't about assigning blame to yourself, but about recognizing patterns in your own decision-making that you can adjust in future projects, since most remodeling friction has contributions from both sides of the relationship.
Consider keeping a simple record of the entire project — your original scope document, your finishes schedule, your budget tracking, your change order log, and your post-project notes — as a single archive. This archive becomes a genuinely useful resource if you sell the home and want to document the quality of work done, if you undertake a future phase of remodeling and want to reference past decisions, or if you simply want to remember, years later, exactly what product was used where.
Ultimately, the difference between a remodel that merely gets completed and one that feels genuinely well executed almost always comes down to sustained attention to details across the entire span of the project, not talent or budget alone. Homeowners who stay engaged with the process — asking questions, documenting decisions, visiting the site, reviewing drawings and samples, and treating the punch list with the same seriousness as the initial design — consistently end up with results that reflect the care they put in. A design-to-completion process gives you the structural continuity to make that sustained attention possible; it is still up to you and your team to use it well.
Final Thoughts on Staying Present Through a Long Process
A full remodel asks a lot of the people going through it: patience during disruption, discipline in decision-making, and the ability to hold both the big picture and the small details in mind simultaneously over a period that often stretches to many months. It's tempting, partway through, to disengage from the granular details and simply trust the process, especially once the big decisions feel settled and the project has developed its own momentum. But the granular details are exactly where the character of a finished remodel lives, and staying present for them, phase after phase, is what turns a competent construction project into a home that feels considered in every corner.
The frameworks in this guide — a clear scope defined before you talk to anyone, a budget that accounts for the invisible costs, a team structure chosen deliberately rather than by default, a materials schedule that leaves no ambiguity, a communication system that puts everything in writing, and a closeout process that treats the punch list and maintenance plan as seriously as the original design — exist to make that sustained attention manageable rather than overwhelming. No single tool guarantees a flawless remodel, because construction involves too many variables and too many people for any process to eliminate all friction. But a homeowner who moves through design-to-completion with this level of structure and attention gives their project the best possible chance of becoming, in the end, exactly the home they set out to create.